Category: Uncategorized

  • Reporting on Munki clients

    There are two popular reporting tools that Munki admins use to see what’s going on with their Munki fleets: MunkiReport-PHP and Sal.

    Which one you choose to use is up to you, and will probably depend on whether you’re more comfortable with a PHP/MySQL setup or a Docker/Django/PostgreSQL setup.

    If you don’t have any experience with any of that, try out the demonstration setups on each to see which feels more comfortable: MunkiReport Quick demo v6
    Getting Started with Sal

    You may read some opinions about not running Docker on a Mac or using MySQL instead of SQLite. Don’t let others’ desires to run things in an optimal environment stop you from running anything at all. You can always enhance your setup later, but having a reporting tool can be very handy.

    That said, you don’t technically need reports from your Munki clients. You may have other ways to find out what in general is going on with your fleet (perhaps your MDM has its own reports). Still, even if you know things like battery health, OS versions, free disk space, etc., without MunkiReport or Sal, you’re not likely to know if your Munki clients are failing to install an item you want installed or getting into an install loop. As you get more experienced as a Munki admin, you’ll know how to head off some of those problems (particularly install loops) at the pass, but sometimes failed installations can get by your testing, especially if the vendor has changed how things are installed from previous versions.

    One other thing, which is probably beyond what most new Munki admins will be up for implementing, but one differentiator (at least as of late 2025) between MunkiReport and Sal is that Sal has support for license seat tracking, though maybe it will come to MunkiReport, too, at some point.

  • How can a user install one item through Managed Software Center without installing all pending installs/updates?

    By design, Munki bundles all updates, installations, and removals to be done at once—either by the user through Managed Software Center, or by Munki in the background once every hour or so. There may be some exceptions in the background (for example, if there are blocking applications), but to the user interfacing with Managed Software Center, it’s either all or nothing, and that’s by design. Greg Neagle, Munki’s primary developer, refers to it as a carrot and stick approach, which basically encourages users to install updates by saying “Hey, if you want this piece of software, you can’t keep putting off all your pending updates.”

    I don’t think it’s quite that simple.

    On the one hand, yes, if you allow users to easily install and remove various things while ignoring pending updates, that makes it very easy for users to ignore pending updates. On the other hand, if you want users to “buy into” how great Managed Software Center is, you want to give them the impression that MSC is there to make their lives easier and not more difficult.

    When I have a user who says “How do I install this?” and comes to me with several pending updates, which I know won’t be quick installations, I try to gauge the urgency of this installation (and maybe ask the user, too). If it seems the user has time to install those, I’ll encourage her to do so. If it seems like a rush, I have a workaround, which is to have her click INSTALL next to the item she wants to install, and then I launch up the terminal (switch users, if necessary—or ask the user to enter her password when prompted):

    sudo managedsoftwareupdate --auto

    This basically does the background run that Munki already does every hour or so, so if there are updates that require a logout or reboot, those get temporarily ignored, same as updates that have blocking applications.

    In addition to encouraging people to install updates when they do have the time to do so (aren’t rushing off to class right away), I do also force updates occasionally. It’s not ideal, and I wouldn’t recommend to do it very often, but if you never do it, you will have faculty/staff/students who basically never install updates. Be judicious, though. You know the culture of your school better than IT folks at other schools do. Could you get away with forcing it every month? Or is once a twice a year more likely to go over well with faculty?

  • How Munki manifests affect the Managed Software Center user experience

    At this point, you should probably know that if you put items in a manifest’s optional installs, it will appear to users for installation/removal on the Software tab of Managed Software Center.

    You probably have also noticed that if you make an item a managed install, Managed Software Center will automatically install it, and if you make an item a managed uninstall, Managed Software Center will automatically remove it.

    At some point in the future, you may want to play around with Featured Items (to not show all optional installs but only certain ones).

    Something that can be a confusing to new Munki admins is the lack of managed installs appearing to users. Initially, that’s not a problem, because you are just focused on getting the managed installs installed. But then you’ll get a teacher who says “Is FileZilla installed on my Mac?” And if you have FileZilla as a managed install, you as the Munki admin know that FileZilla is installed on her computer, but she has no way to verify that through Managed Software Center. If she searched for FileZilla in MSC, nothing would come up. This is because there are a lot of managed installs that you wouldn’t want users to see (various payload-free packages that manage settings). Ideally, as with featured items for optional installs, you’d also be able to have featured items for managed installs (to highlight to users “Yes, you have this, and it’s a mandatory installation”), but that hasn’t been a top priority for Munki development, and it’s not really a dealbreaker for Munki admins. It can just be a bit confusing at first.

    Here’s something else you may notice, particularly in your early rollout of Munki—because your existing fleet probably already has software on it (maybe outdated software, since Munki hasn’t been updating it) before you set up Munki on those client machines, certain optional installs may show up as “other available updates.”

    Other available updates in Managed Software Center

    Here, for example, you can see the user already had older versions of GIMP and Handbrake installed. Instead of MSC just setting them to update, they’re listed as Other available updates. If you click the plus sign next to each, they will then be managed by Munki going forward, as you can see by checking the /Library/Managed Installs/manifests/SelfServeManifest file on the client machine.

    SelfServeManifest on client machine

    Notice that after you click the plus signs, Munki puts them as managed installs in the SelfServeManifest. This isn’t to be confused with the managed installs for the manifest you put in the Munki repo. These are still optional installs for the client machine, but once the client has selected to install the items via MSC, those items become managed by Munki, so they’re locally managed installs, because the user has selected to install them via MSC, so Munki will make sure they stay installed until the user decides to remove them via MSC.

    “Wait,” you might be thinking, “So I have to ask my users to click the plus sign next to every single item they already installed before Munki was on their machines?” Nope. That’s where managed updates come in handy. You don’t have to make everything a managed update, but you should make everything a managed update that you want Munki to keep updated. So it’s highly likely that if you have optional installs that you want users to be able to install but you also want them to always have the latest version, you will make all of those optional installs into managed updates as well.

    Incidentally, if you don’t like the default giant banners in Managed Software Center, you can replace those with your own. That has tangentially to do with manifests in that the client customization .zip file will be the name of the manifest (or site_default if you want it to apply to all clients). More details in the Client Customization section of the Munki wiki.

  • Munki preferences to consider

    Technically, because of Default Repo Detection, you don’t have to set any preferences on a Munki client. But you may still want to. Here are some Munki preferences to consider using at your school.

    SoftwareRepoURL

    Even with Default Repo Detection as an option, it may be a good idea to hard-code the repo URL if you would like to name a specific address that isn’t munki.YOURSCHOOL.edu.

    PerformAuthRestarts

    For FileVault-encrypted computers, this is a good preference to set to true, so users can enter a password and then walk away while the updates are installing without the computer being stuck at the FileVault unlock prompt. More details here.

  • Munki pkginfo keys to consider

    The Munki wiki has a full list of Supported Pkginfo Keys. At some point, you should explore and understand each one. If you’re at the beginning of your Munki admin’ing, though, you may want to at least consider these to start out with. You can edit most of these in MunkiAdmin by double-clicking the item (just be sure to save changes afterwards), or you can edit the pkginfo file directly with a text editor like BBEdit (just be sure to run makecatalogs afterwards).

    unattended_install

    I would highly recommend using this key on any item you have in your Munki repo that doesn’t require a logout or a reboot. Installing or upgrading items without having to bother your users is a beautiful thing. And, yeah, don’t worry about Munki trying to install an application while it’s open (e.g., a user has Chrome open, and it won’t unexpectedly quit so Munki can install an update), because Munki has blocking applications.

    name

    This is something Munki sees but users don’t. When your users see software you make available in Managed Software Center, they’ll see the display name or the description, but they will not see the name, but the name is something you, as the Munki admin should definitely pay attention to—that is how Munki decides X version 2.0 is an upgrade to X version 1.9, because it’s named X.

    requires and update_for

    You can build dependencies in your Munki repos, so if you need a Microsoft Word item to depend on a Microsoft Office license item, then you should either make the license item part of the requires key of the Word pkginfo (any time Munki installs Word, it will make sure the license is installed first) or make Word part of the update_for key of the license pkginfo (any time Munki installs the license, it will also install Word afterwards).

    OnDemand

    The OnDemand key means that the item can be installed over and over again, and Munki won’t care if it’s already been installed. This key makes sense only if you have the item as an optional install in a manifest. If you make an OnDemand item a managed install, it may get into an install loop.

    This can be helpful for any nopkg (script) you want people to run over and over again without regard to whether the script has ever been run before.

    force_install_after_date

    It’s a good thing to know about, but I would be very judicious in using this pkginfo key. It will give some warnings to users but will essentially force them to log out and/or reboot to install whatever you’ve deemed needing a force install. Some corporate environments might force this sort of thing once a week or once a month, but at a school, I can’t imagine using this more than twice a year. More details here.

    preinstall_script and postinstall_script

    A preinstall_script is any script you want to run before the item installs, and a postinstall_script is any script you want to run after the item installs. Keep in mind that everything in Munki runs as root, not as user. zsh and Python are popular scripting options for Munki admins, but scripts can be run using any environment/language you know exists on the client.

  • Avoiding Munki install loops

    One of the most frequent questions that comes up with new Munki admins is Munki successfully installed some software, but now each time Munki runs, it wants to install the software again. Why is this?

    You will know exactly why an install loop happens (and how to fix it) if you read How Munki Decides What Needs To Be Installed

    You’ve read both of those links, right?

    If you use Munki to “install” a drag-and-drop .app bundle in a .dmg, you’re very unlikely to run into an install loop.

    The two things you’re most likely to run into install loops with are .pkgs vendors badly package or nopkgs that you yourself create where the postinstall_script doesn’t change things to satisfy the installcheck_script.

    Then, of course, you can also run into install loops if you accidentally make an OnDemand item a managed install (instead of an optional install).

    While it’s entirely possible your school is using badly packaged .pkgs that no one else is using, chances are someone else has already dealt with the install loop item you’re dealing with, so definitely check to see if there’s an AutoPkg recipe for the item (the recipe maintainer will most likely have the .munki recipe create an installs array to prevent install loops). You can also check the Munki wiki for procedures for various special cases (for example, FileMaker Pro, Logger Pro, Adobe CC, Symantec Endpoint Protection).

    If you can’t find an AutoPkg recipe or a Munki wiki page about a particular weird package, you can try just Googling for name of software Munki, and you might come across a handy blog entry about it. If you still can’t figure it out, don’t be afraid to ask for help on the #munki channel on the MacAdmins Slack or on the Munki Discuss mailing list.

    Note: In 2025, I gave a talk at MacDevOpsYVR about avoiding Munki install loops.

  • Using MunkiAdmin to extract icons for Munki items

    Munki’s command-line tools have the ability to extract icons for various items in your Munki repo, as you saw in Adding an item to your Munki repo

    But you can also use MunkiAdmin to extract icons for items in your repo that you may have populated using AutoPkg.

    MunkiAdmin Batch Extract Icons menu item

    In MunkiAdmin, click on File and then select Batch Extract Icons…

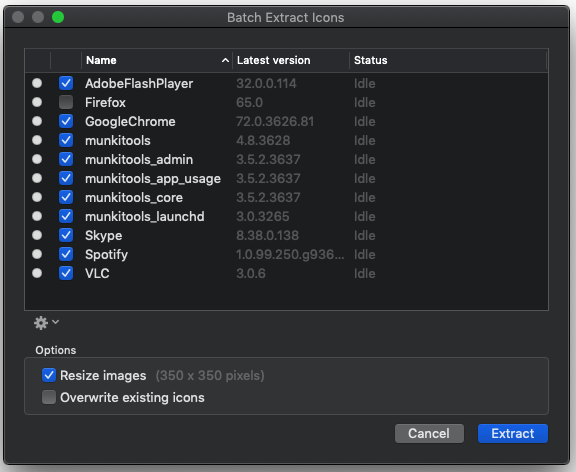
    MunkiAdmin items to extract icons for

    You’ll see that MunkiAdmin selects only the items that don’t already have icons (we imported Firefox manually earlier, and so were able to extract the icon for it during the manual munkiimport process). Click Extract to try to extract icons from each item.

    MunkiAdmin attempts to extract icons

    Some items (like the munkitools ones) don’t have icons, so there are no icons to be extracted. Other items (like AdobeFlashPlayer) may have multiple icons, so one can’t automatically be assigned. (Adobe Flash isn’t really a thing any more, but it was when I took these screenshots. Same principle applies, though: you may often come across items that have multiple icons.)

    MunkiAdmin items view with icons in place.

    Afterwards, you should see items (instead of package placeholders) for the items that MunkiAdmin was able to successfully extract icons for.

    New icon for single item

    If you want to get the icon for AdobeFlashPlayer, you can right-click it, select Icon and then Create New Icon for Name “AdobeFlashPlayer”

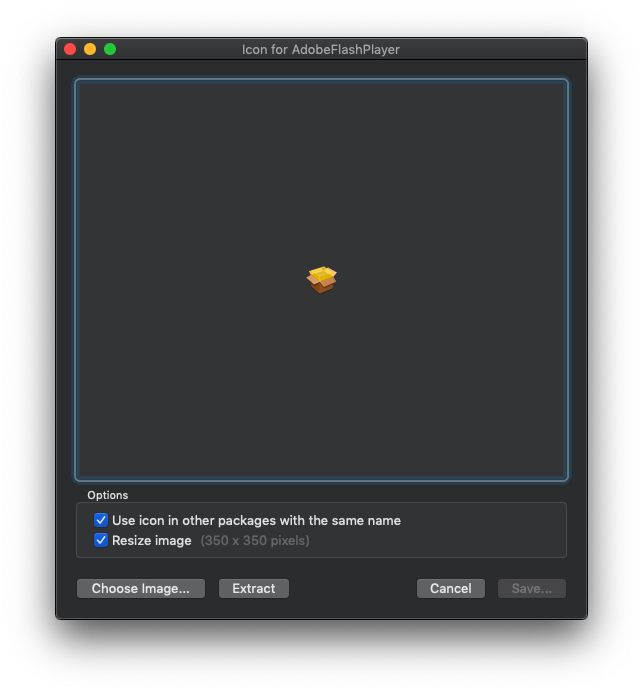
    Click Extract

    Icon chooser in MunkiAdmin

    Pick whichever icon you like best out of the extracted icons.

    Click Save

    Icon save dialogue in MunkiAdmin

    Then, click Save again.

  • Setting up and using AutoPkg .munki recipes

    Install AutoPkg

    You can find and install the latest release from the AutoPkg GitHub page.

    Set up AutoPkg for Munki

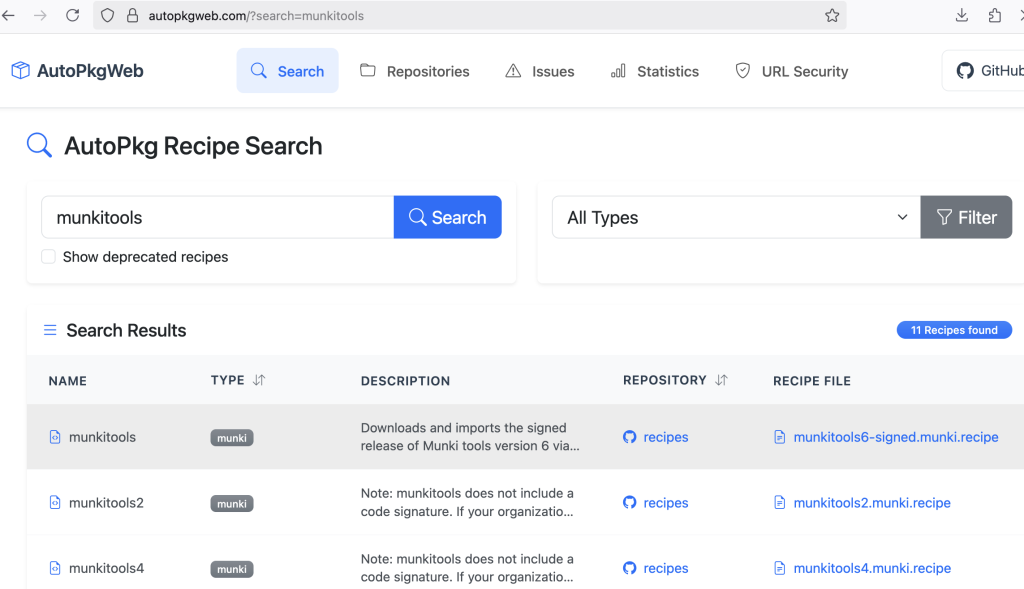
    Because of how GitHub has made it so you have to log into GitHub to search it, there’s a website you can use to search AutoPkg recipes: autopkgweb.com.


    You can search for a recipe, and you’ll see what the recipe is and what the recipe repo is that it belongs to.

    So, in this example, you can see a munkitools6-signed.munki.recipe recipe in the recipes repo.

    You should add that repo to have access to the recipes in it:

    autopkg repo-add recipes

    Then you can make an override for the munkitools6-signed.munki.recipe recipe, so you can use it properly.

    autopkg make-override munkitools6-signed.munki.recipe
    Override file saved to /Users/username/Library/AutoPkg/RecipeOverrides/munkitools6-signed.munki.recipe

    You’ll also want to make an override for the MakeCatalogs recipe as well:

    autopkg make-override MakeCatalogs.munki
    Override file saved to /Users/username/Library/AutoPkg/RecipeOverrides/MakeCatalogs.munki.recipe

    The MakeCatalogs recipe will see if anything new is imported into your Munki repo, and then will run makecatalogs if necessary, so your clients can see the changes.

    Make sure you fail recipes that don’t have trust info:

    defaults write com.github.autopkg FAIL_RECIPES_WITHOUT_TRUST_INFO -bool YES

    One final thing you want to do is tell AutoPkg where you Munki repo is:

    defaults write com.github.autopkg MUNKI_REPO /Users/Shared/munki_repo

    Now, you’re ready to run your first .munki AutoPkg recipe.

    Using AutoPkg

    Try running one .munki recipe:

    autopkg run -v munkitools6-signed.munki.recipe MakeCatalogs.munki.recipe

    The -v flag just gives you some more verbose output. You can run it without -v for less verbose output, or you can run it with several (-vvv) for even more verbose output.

    Make a bunch more overrides for recipes:


    autopkg make-override GoogleChrome.munki
    autopkg make-override Firefox.munki
    autopkg make-override Spotify.munki
    autopkg make-override VLC.munki

    You should then be able to run a series of .munki recipes all together:

    autopkg run -v GoogleChrome.munki Firefox.munki Spotify.munki VLC.munki munkitools6-signed.munki MakeCatalogs.munki

    MunkiAdmin items view

    Now if you go back to MunkiAdmin and Reload your repo, you should see a bunch of new things that AutoPkg fetched.

    If you’re confused a bit about overrides and trust info, you should really read AutoPkg and recipe parent trust info

    I’ve also written up a script that will prompt you to approve changes in recipes that have been updated.

    You may also want to check out a project called AutoPkgr, which provides a point-and-click GUI for managing AutoPkg repositories and recipes. Just keep in mind that the project is good, but it’s also hasn’t been actively developed in a while.

  • Why you should use AutoPkg to populate and keep up to date your Munki repo

    So far, all we’ve done is import Firefox into your Munki repo. Your Munki repo is a bit bare. It would probably take a long time to import every single piece of software you want to deploy to your Mac fleet using munkiimport every time. Fortunately, there is a project that helps you automate importing new versions of software into your repo: AutoPkg.

    There are other advantages to using AutoPkg instead of manually using munkiimport for every single item you want to add to your Munki repo.

    First of all, with AutoPkg, you’re far less likely to run into the Munki successfully installed some software, but now each time Munki runs, it wants to install the software again. Why is this? issue a lot of new Munki admins hit at one point or another.

    You really should have a good read of How Munki Decides What Needs To Be Installed, which really is an important piece of understanding how Munki works, especially since there isn’t an AutoPkg recipe for every possible thing you might want to import into your Munki repo. Vendors who package installers badly make it difficult for Munki to auto-detect how it should be determined to be installed or not, so you may sometimes have to create an installs array or installcheck_script to compensate for the bad packaging.

    AutoPkg basically automates a lot of manual processes. How it pertains to Munki would specifically be the manual process of checking to see if there’s a new version of software, downloading that new version, importing it into the Munki repo, and then potentially editing the pkginfo for the item so that Munki won’t get into an install loop if the vendor packaged the installer badly.

    Another handy thing AutoPkg can do is actually help you update Munki for your clients. Yes, you can manually download the latest Munki tools package, import it using munkiimport, and make sure it’s added to the relevant manifests your clients use, but then your clients will have to restart every time you update Munki. With AutoPkg, there’s a munkitools6-signed.munki.recipe recipe that downloads the Munki tools package, unpacks the package into individual components, and then imports each component separately. That way, unless the actual launchd part of Munki changes, your client machines won’t have to reboot.

    That’s why you should use AutoPkg. Next time, we’ll go into the actual steps to set up and use AutoPkg.

  • How to deploy Munki to your fleet for the first time

    If you are using an MDM, and all of your Mac clients are already enrolled in the MDM, you can likely use the MDM to deploy Munki to your client machines (Mosyle, for example, you can do this). Hopefully, your MDM can also deploy custom .mobileconfig profiles (again, Mosyle can do this, if you upload the mcxToProfile-generated profile as a “certificate”).

    If you don’t have your clients in an MDM, maybe you have some other way to remotely install Munki on those clients. For example, if your machines have Apple Remote Desktop enabled, you might be able to use ARD to push the Munki tools .pkg to the client machines. For an ARD deployment of Munki, it may be easier to use defaults write commands to set the preferences than to deliver the .mobileconfig as a payload and then use a command to install it later.

    You could also try simply instructing your users to install Munki (and the .mobileconfig profile for Munki preferences) themselves, assuming they have local admin privileges on their own machines, and assuming they actually listen when you suggest they do things.

    As a fallback, if you’re in the same physical location as all or most of your clients, you can literally just walk around campus and say “Hey, I have to install this on your computer,” and then install Munki manually in person.

    When I rolled out Munki, it took a little while, and I ended up doing some combination of all of the above. Some machines I could access via ARD and push the Munki tools .pkg and preferences to. Others I asked the users to install Munki on themselves. Still others I walked around to and installed Munki on manually. And then, going forward once we got an MDM, I used our MDM to install Munki on clients.

    Unfortunately, if you don’t have any way to currently manage your Macs, there isn’t some magic way to get Munki set up en masse. You just have to do it. At least if your school has a full inventory of every machine, you can just go down the list and make sure you have every machine covered eventually. If your school inventory isn’t complete, you may discover even years down the road that there was some rogue unmanaged machine that you later had to put Munki on.

  • Setting Munki preferences for your client machines

    It’s true that you can use Default Repo Detection to have your Munki clients connect to your Munki repo without having to actually adjust the Munki preferences for all your clients, but what if you do want to set the Munki preferences? For example, instead of https://munki.YOURSCHOOL.edu/munki_repo, maybe you want to use something else entirely, like https://awesomesoftware.YOURSCHOOL.edu, or even an IP address like https://10.0.3.220/repo.

    I’d recommend using defaults write commands to write the preferences to your own client, and then converting that into a .mobileconfig profile you can deploy to your clients.

    So on your own machine, for example, you can run commands like these (modify to suit your own needs):

    sudo defaults write /Library/Preferences/ManagedInstalls SoftwareRepoURL "https://ADDRESSFORYOURMUNKIREPO"


    sudo defaults write /Library/Preferences/ManagedInstalls PerformAuthRestarts -bool TRUE

    You can set whatever Munki preferences you want. Those above are just examples.

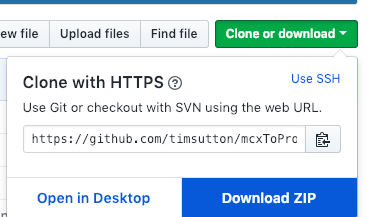
    Download ZIP of mcxToProfile from GitHub

    Once you have the preferences you want, download mcxToProfile, unzip the download, and then run

    Downloads/mcxToProfile-master/mcxToProfile.py --plist /Library/Preferences/ManagedInstalls.plist --identifier MunkiPreferences

    and that should create a .mobileconfig profile called MunkiPreferences.mobileconfig, which you can use to deploy Munki preferences to your client Macs (either by having folks double-click the .mobileconfig file to install it, or by uploading it to your MDM to deploy out to your clients).

  • Adding some basic security to your Munki repo

    SSL

    So far, we’ve just been working with http instead of https. Yeah, that’s not good going forward. So you’ll want to fix that, especially if you add basic authentication.

    So, yeah, even though your Munki “website” is “static,” you should at least make it https.

    Let’s Encrypt

    If your Munki repo is public-facing (try to be conservative with what kind of traffic you translate WAN-to-LAN on your firewall), you can get a free SSL certificate by using Let’s Encrypt’s certbot.

    Self-signed certificate

    You can create a self-signed certificate. More details at Using https / self-signed certificates and basic authentication with Munki.

    https going forward

    The links above should help, but securing a web server isn’t a Munki-specific thing, so have a look at the links above. If they get you going with securing your repo, yay! If not, you can continue with http for now, but you may want to revisit in the future. Going forward, all the rest of the tutorials will assume you have https enabled.

    Securing access to the repo

    https and basic authentication add some security to the access of the repo by clients, but you should also protect write access to the repo. In fact, that protection is more important. Munki runs as root, so any changes to the repo must be made carefully and only by approved people in your school. One wrong script could wipe out user data or cause other problems.

  • Organizing your Munki manifests

    So far, you’ve just been using site_default as the manifest for your machine. That may be fine to start with, especially if all your machines (Mac Minis, iMacs, MacBook Airs, MacBook Pros, etc.) are all going to get the same (managed and/or optional) software.

    You may find, though, that you have special cases. Maybe one machine has to have a certain application definitely installed while other machines can have that application as optional (up to the user to install). Or maybe you have a group of machines that need only four applications, and the other machines need fifteen applications. Or you want some software available to one department but not another department.

    This is where serial number manifests and included manifests can come in handy.

    Remember how Munki has Default Manifest Resolution?

    First, it will try the fully qualified domain name for the machine, then the short hostname, then the serial number of the machine, then site_default. So if you create a manifest for the serial number, that will be used instead of site_default.

    Here is an example of how I would recommend you structure your manifests (note that Display Name is only in MunkiAdmin—Munki itself doesn’t do anything special with the Display Name in manifests):

    Manifest organization viewed through MunkiAdmin

    The filename for your serial number manifest would be the actual serial number of the machine. This would have a catalog of testing if it were a machine that did testing or a catalog of production if it were in production, or both testing and production if you want it to get items from both catalogs. It would then include at least one other manifest.

    Included manifests do not have catalogs. It’s also a good idea to have included manifests within a subdirectory (e.g., groups or includeds) just so you don’t accidentally have machines use them as machine manifests instead of included ones. It’s possible you would have a machine named EnglishDept but extremely unlikely you’d have a machine called groups/EnglishDept (can hostnames even have a slash in them?).

    In this example above, site_default includes groups/common_software, and the Mac Mini serial number manifest includes both groups/common_software and groups/english_dept.

    Import Manifests from CSV menu in MunkiAdmin

    If you would like to create a whole bunch of serial number manifests at once (not one at a time), you can import a comma-separated values text file.

    If this all sounds too confusing right now, that’s okay. You can come back to it. If you just need to get up and running, and you can worry about manifest organization later, just stick with site_default for now.

    Further Reading
    An opinionated guide to Munki manifests
    Another opinionated guide to Munki manifests

  • Managed installs, managed updates, optional installs, and managed uninstalls in Munki manifests

    So now that your Munki client is pulling its manifest from the Munki repo, you can use different manifest options to make software available, mandatory for install, or mandatory for removal.

    Optional install available to be removed

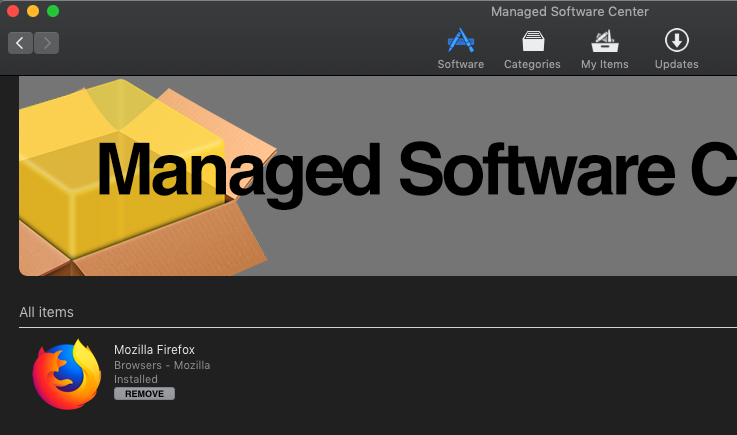
    When the item is put in optional installs, users can launch up Managed Software Center, click on the Software tab, and then see either INSTALL (if the item is not yet installed) or REMOVE (if the item is already installed) as options for that item. Only items that are optional installs will ever show up in the Software tab. Managed installs and managed uninstalls will not show up.

    Adding an item to Managed Installs in a manifest

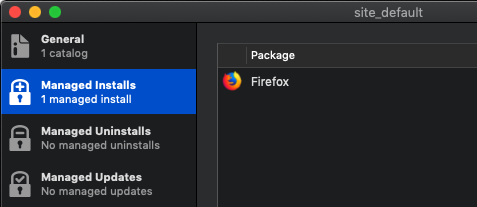
    Go ahead and take Firefox out of Optional Installs and put it in Managed Installs and then save your changes.

    Managed Software Center with no optional installs

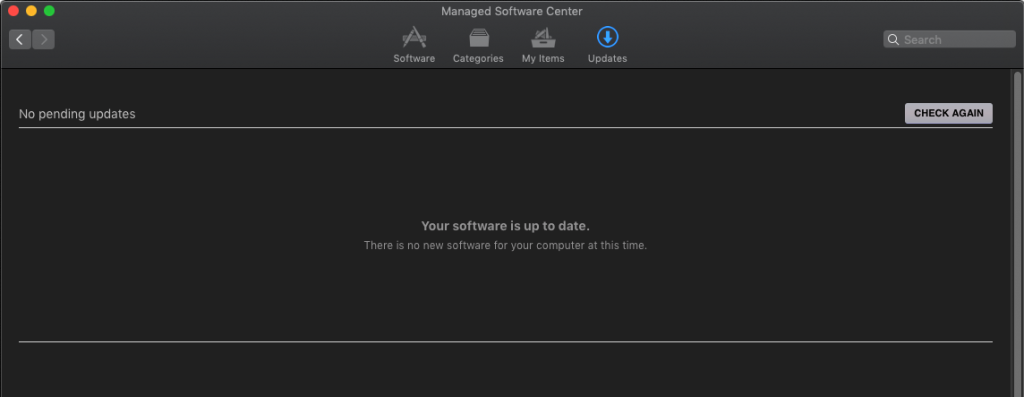
    Click the CHECK AGAIN button in Managed Software Center. Now that there are no longer any optional installs, you’ll see that the Software tab is greyed out.

    Now, go ahead and delete Firefox.app from the /Applications folder, and then click CHECK AGAIN in Managed Software Center.

    Managed Software Center showing a managed install as ready to install

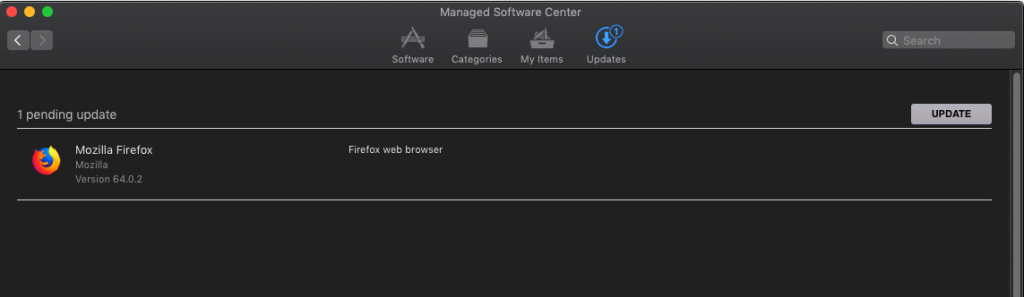
    Since Munki sees that Firefox is missing from the /Applications folder and since the manifest your client is using has Firefox as a managed install, Munki makes sure that Firefox is installed and thus wants to re-install Firefox. If you then click UPDATE in Managed Software Center, Munki should reinstall Firefox. And then if you click CHECK AGAIN again, it should see Firefox is already installed and not try to do anything else.

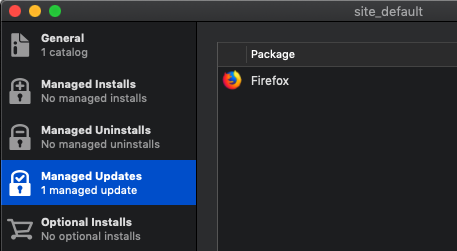
    An item in the Managed Updates section of a manifest

    Another place you can put items in a manifest is Managed Updates. All that means is, if someone installed an item not using Managed Software Center, Munki will make sure that it’s automatically kept up to date, as if it were installed via Managed Software Center.

    So if someone installs Firefox on her own, and you don’t have Firefox as a managed update, but you keep importing new versions of Firefox into your Munki repo, she’ll see Firefox as an optional upgrade in Managed Software Center, but she can also keep ignoring the upgrade prompt. But if you have Firefox as a managed update, she’ll just have her version of Firefox automatically updated to the latest you have available in your Munki repo that’s in the same catalog as the manifest her computer is using.

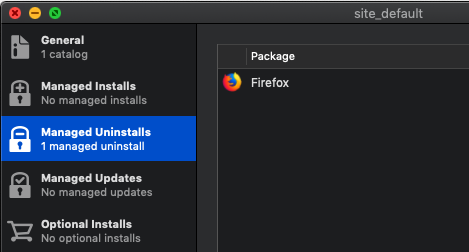
    Managed Uninstalls in MunkiAdmin for a manifest

    Final one to try (ignore featured items for now—that’s a subset of optional installs, and it’s not critical to know about at this stage) is taking Firefox out of managed installs and out of optional installs, and then putting it into Managed Uninstalls and then saving.

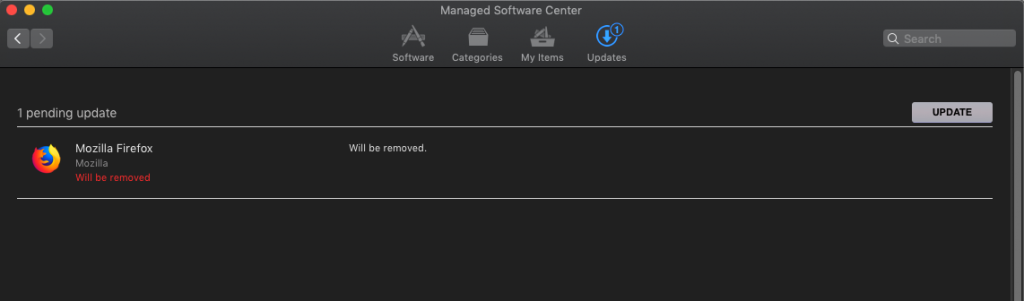
    Managed Software Center prompting to remove a managed uninstall

    Once you CHECK AGAIN in Managed Software Center, you should see MSC prompting to remove Firefox, because it’s a managed uninstall. If you click UPDATE, MSC will remove Firefox from your client machine.

    Note that as a Munki admin, you shouldn’t ever have the same item in the same manifest be both a managed install and an optional install, a managed install and a managed uninstall, or a managed uninstall and an optional install. If you do that, you may get unexpected behavior.

  • Connecting a Munki client to the Munki repo

    Now that you’ve set up a web server, put the Munki repo folders on it, installed Munki tools on it, imported an item into it, and set up a manifest for it, you can finally connect a Mac client to it.

    Good news! Since you installed all the Munki tools (not just the admin ones), your Mac web server that’s hosting the Munki repo can also be a Munki client of itself.

    Probably the easiest way to connect the Munki client to the Munki server is to give your Munki repo a fully qualified domain name (fqdn) of munki.YOURSCHOOL.edu/munki_repo

    There are certain repo URLs Munki will try automatically. So it’s one less thing for you to define. If you don’t want to give your repo that kind of fqdn or prefer to reference it by IP address (make sure the IP address is static, then!), you’ll have to set a Munki preference for SoftwareRepoURL:

    sudo defaults write /Library/Preferences/ManagedInstalls SoftwareRepoURL "http://192.168.1.200/munki_repo"

    or

    sudo defaults write /Library/Preferences/ManagedInstalls SoftwareRepoURL "http://somesubdomainthatsnotmunki.YOURSCHOOL.edu/munki_repo"

    Reminder: if your Munki repo can be referenced via munki.YOURSCHOOL.edu/munki_repo, you do not need to set a SoftwareRepoURL.

    Also, for now we’re just using regular http instead of https, but after you get a little more comfortable with Munki, you definitely want to switch over to https either via self-signed certificate or a proper certificate authority–issued certificate (Let’s Encrypt ones are free).

    Now that it’s configured, let’s test it out.

    sudo managedsoftwareupdate -v

    You should see something like this:

    Managed Software Update Tool
    Copyright 2010-2018 The Munki Project
    https://github.com/munki/munki

    Starting...
    Checking for available updates...
    No client id specified. Requesting NAMEOFCOMPUTER.lan...
    Getting manifest NAMEOFCOMPUTER.lan...
    Retrieving list of software for this machine...
    Bytes received: 233
    Request failed. Trying NAMEOFCOMPUTER...
    Getting manifest NAMEOFCOMPUTER...
    Retrieving list of software for this machine...
    Bytes received: 229
    Request failed. Trying SERIALNUMBEROFCOMPUTER...
    Getting manifest SERIALNUMBEROFCOMPUTER...
    Retrieving list of software for this machine...
    Bytes received: 231
    Request failed. Trying site_default...
    Getting manifest site_default...
    Using manifest: site_default
    Preventing idle sleep
    **Checking for installs**
    Getting catalog testing...
    **Checking for removals**
    **Checking for managed updates**
    Getting client resources...
    Bytes received: 242
    Getting client resources...
    Bytes received: 242
    No change in InstallInfo.
    Allowing idle sleep
    Finishing...
    Done.

    Just as Munki will try to guess the Munki repo (unless you specify it with SoftwareRepoURL), Munki will also try to guess what manifest you’re using (unless you specify one with ClientIdentifier). For greater flexibility, I would highly recommend against using a ClientIdentifier, unless you have a very good reason to do so. Until you can figure out how you want to structure your manifests, it’s best to start with just the site_default manifest you created earlier. That is the last manifest guess Munki makes. So if you later want to target machines more specifically, you can create a serial number manifest or a hostname manifest, which Munki will guess (and use) before even getting to site_default.

    Want to see what this would really look like to an end user (who probably won’t be running managedsoftwareupdate manually)?

    Go ahead and launch up /Applications/Managed Software Center.app.